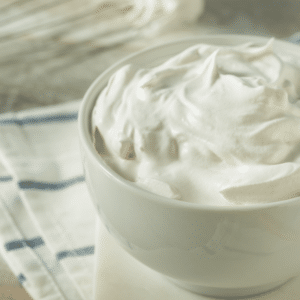
Anyone who has tried to preserve the fluffiness of freshly whipped cream knows the all-too-common problem of it deflating before serving. Many recipes call for using gelatin to stabilize whipped cream but I have a secret weapon in my culinary arsenal – this will revolutionize your whipped cream game. This easy stabilized whipped cream recipe with cream cheese recipe is where it’s at! The delicate lightness of traditional whipped cream infused perfectly with the richness of cream cheese. It’s velvety smooth, long lasting and will elevate your desserts to new heights. Use in a biscoff cake, mango cheesecake, Philadelphia no bake cheesecake recipe or as a topping for brown butter madeleines!

Table of Contents
Why Love This Cream Cheese Whipped Cream Recipe
It’s a game-changer: Say goodbye to runny and deflated whipped cream disasters. With this recipe, your whipped cream will stay beautifully fluffy and stable.
Cream cheese adds a delightful tang: The addition of creamy and tangy cream cheese takes your regular whipped cream to a whole new level of indulgence.
Simple ingredients: Unlike other stabilized whipped cream recipes, this one doesn’t call for gelatin, cornstarch, or even cream of tartar.
It’s versatile: You can use this stabilizing technique for various desserts like cakes, pies, cupcakes, roasted fruits – basically anything that could use a dollop of pillowy heaven.
What Is Stabilized Whipped Cream?
Stabilized whipped cream is essentially plain whipped cream reinforced with an ingredient that helps it maintain its shape and texture for longer periods without deflating or melting away.
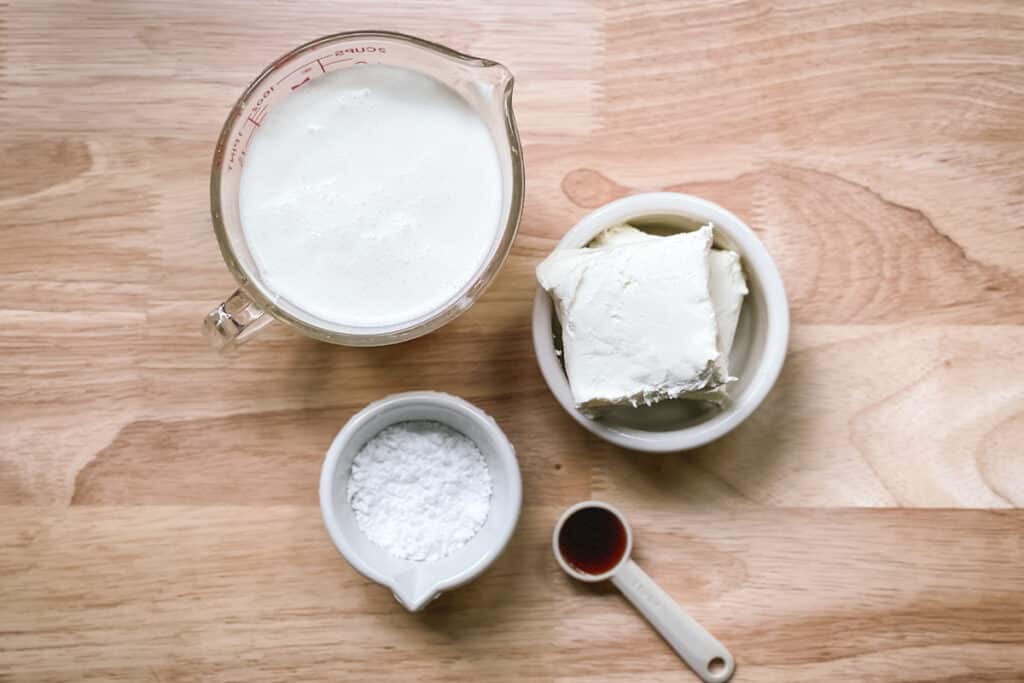
Ingredients Needed
Heavy whipping cream: This is the base of our whipped cream. For best results, use very cold cream.
Vanilla extract: A hint of vanilla adds an aromatic touch. Use the real stuff.
Powdered sugar: Powdered sugar dissolves easily into the whipped cream mixture but you can also use granulated sugar.
Cream cheese: The unsung hero that brings stability, tanginess and a luxurious richness to our whipped cream.
How To Make Stabilized Whipped Cream With Cream Cheese
In a cold bowl, combine the softened cream cheese and powdered sugar. Use an electric hand mixer or stand mixer with whisk attachment to blend them together until smooth and well incorporated.
Once smooth and creamy, add the cold heavy cream and vanilla extract. Start at low speed to prevent splattering and increase to medium-high speed once thoroughly mixed.
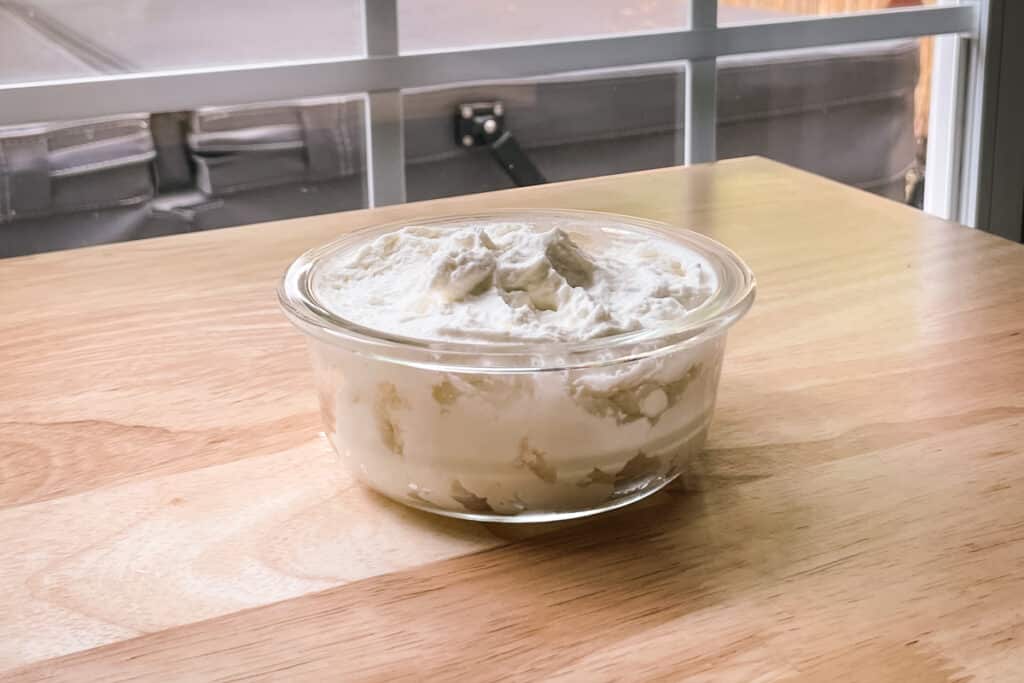
Whisk until the mixture thickens and reaches a creamy consistency. You should see soft but stiff peaks forming as the cream thickens. This process may take a few minutes, so be patient. Don’t overmix because you may accidentally churn butter! Been there, done that. Just mix until you see firm peaks.
Once the stabilized whipped cream with cream cheese is ready, it can be used immediately to top your favorite desserts or refrigerated until needed.
Storing Leftover Whipped Cream
If you don’t need to use the stabilized whipped cream right away and somehow manage to resist eating all of it straight from the bowl (I applaud your willpower), here are some storage tips:
- Transfer any remaining whipped cream into an airtight container.
- Store it in the refrigerator for up to 2-3 days.
- Give it a gentle whisk before using it to restore its fluffiness.
How To Use Stabilized Whipped Cream
Now that you have this magical whipped cream on hand, let’s talk about some scrumptious ways to use it:
Dollop it onto your favorite slice of pie, whether it’s classic apple or tangy lemon meringue.
Use it to frost cakes such as these mini peach cobbler pound cakes. It holds up beautifully between the layers and gives your cake that wow factor. It’s perfect for frosting angel food cake.
Top off a big bowl of fresh fruit or roasted stone fruit for a lighter yet decadent dessert.
Pipe it onto cupcakes for an extra creamy twist. Sprinkle some chocolate shavings or colorful sprinkles for a fun touch.
Dollop in on homemade pudding or use it to stuff french toast.

How Long Does Stabilized Whipped Cream Last?
This recipe can maintain its shape and texture for up to three days when properly stored in the refrigerator. You don’t have to worry about a sad deflated mess!
Stabilized Whipped Cream Variations
Let’s jazz things up a bit! Here are some fun variations you can try with your stabilized whipped cream:
Chocolate lover? Add cocoa powder or melted chocolate to the mixture for a rich chocolaty twist.
Feeling playful? Toss in some crushed Oreos, sprinkles, or crushed candy canes into the whipped cream for added crunch and flavor bursts.
Boozy vibes? Swap out vanilla extract for your favorite liqueur like Bailey’s Irish Cream or Kahlua. Yum!
Stabilized Whipped Cream FAQs
Can I freeze stabilized whipped cream?
Unfortunately, freezing stabilized whipped cream is not recommended as it alters the texture upon thawing.
Can I use light whipping cream instead of heavy whipping cream?
When it comes to creating a fluffy texture, the fat content of cream plays a crucial role. Light cream has about 20% fat content which falls short when compared to heavy cream, which boasts a fat content ranging from 36% to 40%. As a result, substituting light cream in recipes that call for whipping may not yield the desired results.
Can I omit the powdered sugar?
Powdered sugar not only adds sweetness but also helps stabilize the whipped cream. It’s best to keep it in for optimal results. You can however use granulated sugar.
How do I stabilize whipped cream with gelatin?
Not into cream cheese? No problem!
- Start by sprinkling 1 teaspoon of unflavored gelatin powder over 4 teaspoons of cold water in a small microwave-safe bowl. Let it sit for about 5 minutes to allow the gelatin to bloom.
- After the gelatin has bloomed, microwave in short intervals, stirring in between, until the gelatin has completely dissolved. Be careful not to overheat it.
- Let the gelatin mixture cool down to room temperature.
- In a separate mixing bowl, using an electric mixer whip heavy cream, vanilla and powdered sugar until it begins to thicken.
- Gradually pour the cooled gelatin mixture into the whipped cream while continuing to whip.
- Continue whipping until soft peaks form.
There you have it, stabilized whipped cream made with cream cheese is my go to. No gelatin is required, just pure creamy goodness. The next time you need a stable and dreamy whipped cream, give this recipe a whirl! It’s the perfect topping for a yummy dessert. It’s so much better than the store-bought stuff. Trust me; you won’t regret it. Happy whipping!
Stabilized Whipped Cream with Cream Cheese
Ingredients
- 8 oz cream cheese, softened
- ¾ cup powdered sugar
- 2 cups heavy whipping cream
- 1 tsp vanilla extract
Instructions
- In a cold bowl, combine the softened cream cheese and powdered sugar. Use an electric hand mixer or stand mixer with whisk attachment to blend them together until smooth and well incorporated.
- Once smooth and creamy, add the cold heavy cream and vanilla extract. Start at low speed to prevent splattering and increase to medium-high speed once thoroughly mixed.
- Whisk until the mixture thickens and reaches a creamy consistency. You should see soft but stiff peaks forming as the cream thickens. This process may take a few minutes, so be patient.
- Once the stabilized whipped cream with cream cheese is ready, it can be used immediately to top your favorite desserts or refrigerated until needed.